Tuesday, November 9, 2010

End of Summer Eggplant...

So we finally pulled out the last of our summer garden last Saturday…our summer was so cool lots of things took longer than usual to ripen and when we did have a mini heat spell in early October several of our plants really got in gear and decided it was time to produce - go figure - Mother Nature can really mess with a plant’s head! These factors made it really hard to pull out the summer plants, even though it should have been done weeks ago! But my large post-it note that says PLANT SWEET PEA SEEDS HALLOWEEN WEEKEND has been screaming at me for a week now and since those plants reside along the fence at the back of my vegetable garden I was motivated…

When I pull out these last plants there is always one last pile of summer veggies that need to either be eaten or preserved…cherry tomatoes eaten, no problem…bell and ‘big bob’ peppers, probably preserved…half a dozen eggplant, hmmmm…I decided this was a good time to make my ‘Sort of like lasagna, too many eggplant, one pan meal’ recipe. It’s easy and a big winner around here. And best of all you can make substitutions all over the place and it still tastes great.

3 eggplant - sliced
1 qt. jar canned tomatoes or marinara sauce
2 cups grated cheese - parmesan or Romano work well (now this time I had some left over ‘stuffed mushroom appetizer’ stuffing - it has bread crumbs, garlic, Romano cheese, chopped mushroom stems cooked in Marsala wine and parsley - I used that and it was really a nice add)
Olive oil

Heat oven to 375 degrees
Heat a large frying pan on medium/high heat
Brush both sides of the eggplant with olive oil
Cook eggplant in pan - 5 minutes per side, remove from pan continue with eggplant slices until all are cooked.
Put one layer of eggplant slices on the bottom of an 8”x8” pan
Cover eggplant with ½ the jar of tomato
Sprinkle with ½ the cheese
Repeat the layers
Cover pan with tinfoil and put in an oven for 20 minutes, remove the foil and cook for 10 more minutes to get the top layer of cheese a little crispy.

Serve with a side salad and there you go…quick, easy breezy, no fuss dinner…and we all like those every once and a while!

Wednesday, October 27, 2010

Apple Update!

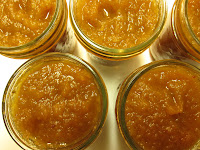
Okay, a quick apple update is needed here…right after I produced my apple cranberry jam, I noticed a post on Tigress in a Jam’s website (tigressinajam.blogspot.com) for Ancho Apple Butter…my taste buds snapped to attention! After my summer success (obsession) with the Chile Blackberry Syrup from 101Cookbooks, the thought of fall fruit jazzed up with the heat of an ancho chile - one of my personal chile faves - well, nothing would do but to whip up a batch! It’s a quick easy recipe, so a good one for a little evening project…I produced 6 - ½ pint jars in a couple hours!
Ancho Apple Butter - from Tigress in a Jam
5 LBS apples - stemmed & 
quartered, skin & seeds intact
1/2 cup white wine vinegar
1 & 2/3 to 2 cups raw cane sugar
9 allspice berries
1 to 2 teaspoons ground ancho chiles
1/2 pint or pint mason jars
food mill

yield: approximately 4 - ½ pint jars (like I say - I got 6…so have some extra jars and lids ready just in case)

1. Place apple quarters and 2 cups cold water in a non-reactive stock pot and bring to the boil. Reduce to a simmer and cook until apples are soft - about 20 minutes. (I used this timing and it was just right)
2. As apples are cooking prepare canning pot and jars for processing. Jars should be warmed but no need to sterilize.

3. When apples are soft all the way through take off the heat and pass them through a food mill. Discard the skins & seeds and return the apple flesh to pot. Add sugar, ground ancho, wine vinegar, and whole allspice. Place the allspice in a cloth tea bag, metal tea ball, or cheesecloth so that it is easy to fish out later.

4. Cook on medium, stirring regularly until butter thick - about 30 minutes (I found that mine was ready in about 25 minutes). As it thickens you will have to stir more often to prevent sticking. You'll know it's done when you can place a dollop on a plate and the sides don't leak.

5. Fill jars to 1/4 inch head space, tap the jars gently on the towel covered counter to get rid of air bubbles. Run a plastic chopstick around the inside rim if air bubbles are persistent.

6. Process in boiling water bath for 10 minutes.

I think this will be off the hook served with corn bread, but in the mean time I have found that toast, finger, spoon, cracker…work just fine!

Monday, October 25, 2010

Apples = Fall...


As all the lovely summer fruit starts to fade from the farmer’s market, a cook's fancy turns to apples…could be the beginning of some odd cooking novel…but the truth is that apples do make it feel like fall. Could the connection be from back in the dark ages of grammar school, when it wasn’t yet fashionable to ‘eat local’, and fruit wasn’t shipped around the world so the concept of what was in season was a fact Jack,
from September to – it seemed like forever – the fruit serving in my home packed lunch was…an apple! A-h-h fall…And now there are so many wonderful varieties showing their pink, yellow, green, red, and variegated faces from the over flowing bins. All those flavors and textures, sweet, tart, crisp, soft. Old favorites like Jonathans or Pippins and some newer favorites like Honeycrisp or Pink Lady beckon us to overfill our shopping baskets. Well, last week I got into the swing of it and decided to first, make some apple sauce and then for fun, some apple cranberry jam…I purchased about 12 lbs of Honeycrisp apples (my current fave ) and lugged them home. The first order of business was apple sauce. As I began peeling the apples I truly yearned for one of those little gadgets that peels and cores apples! It’s been a while since I have prepared that many apples and I actually got a cramp in my forearm! But a little cramp has never slowed me down…The apple sauce I like is a pretty straight forward affair, apples, water, sugar, cinnamon and a touch of nutmeg for good measure…
Apple Sauce

9LBS. Apples

2 ¼ C Sugar

1 ¼ tsp Ground Cinnamon

1 ¼ tsp Ground Nutmeg

Wash, core, peel apples and cut into quarters. Cook approximately 10 minutes in a covered saucepot with just enough water to prevent sticking. Put apples through a food mill or food processor. Return apples to the saucepot and add sugar and spices. Bring applesauce to a boil, stirring to prevent sticking. Maintain at a boil while filleing jars. Ladle hot sauce into hot jars, leaving ½ inch headspace. Remove air bubbles, put on two part lids and place jars in water bath canner. When water is boiling process both pints and quarts for 20 minutes.

Next came the apple cranberry jam, although after making it I think it should more aptly be called cranberry apple jam – next time – more apples, but it is REALLY yummy none the less. Sort of like a really flavorful cranberry sauce in jam form. I have figured out some way to enjoy it almost every day since it’s creation…
Apple Cranberry Jam – adapted from Ball Bluebook Guide to Preserving

2LBS Cranberries

3LBS Apples cored, peeled and chopped

1 Orange seeded and chopped

3 C Sugar

2 C Water

½ C Honey

Combine all ingredients in a large saucepot. Bring slowly to a boil, stirring until sugar dissolves. Boil gently almost to gelling point - about 35 minutes. remove from heat, skim off foam if necessary and ladle hot preserves into hot jars. Leave ¼ inch headspace, remove air bullbles and put on two part lids. Place in water bath canner. When water is boiling process ½ pint jars for 15 minutes.

Everything was beautiful and yummy, and the house smelled of apples and spice. It really is fall now! My next task is to try some Ancho Apple Butter that I saw a recipe for on the Tigress in a Jam blog! That just sounds to good to pass up and after my success with the Chile Blackberry Syrup last summer the spicy/fruit thing is very appealing…I’ll let you know how it goes!

Tuesday, October 19, 2010

These Gals are the Bomb!

Just a quick bee update...we did the final honey harvest for the year, removed two boxes from the top of the hive and then closed up the hive for the winter.  The girls have 45 lbs. of honey to keep them well feed until about March when they will again be able to find flowers on which to dine...But to our good fortune the girls made 20 additional lbs. of honey for us!  They are truely awsome! Especially when you consider that the bees have to hit two million flowers and travel about 55,000 miles to make 1 lb. of honey!  Thank you girls...see you in the spring!

Wednesday, October 6, 2010

TOMATO-RAMA 2010!

It’s that time of year again…and what time is that you ask…tomato canning time! Back several years ago a girlfriend and I thought we would can some tomatoes, I think it was 20 lbs. …straight up, canned tomatoes…we thought we were canning mavens! Needless to say, what with soups, stews, marina sauce, etc. we each blasted through our share of those tomatoes in no time. The following year we upped the ante…40 lbs. what were we thinking?! You have no idea just how many tomatoes you go through in the tomato ‘off months’…so last year being the wise women that we are, we decided that what we really needed to do was to can both marinara sauce AND straight tomatoes. So 60 lbs. it was…and we reasoned that if we had already prepared and canned marinara sauce we wouldn’t be using up our plain tomatoes to make, ya know, marinara sauce…60 lbs. seemed like an amount that would get us each through until tomatoes were bountiful once again…what children we were! Now, here is where I feel a need to put in a word of warning to any of you who think canning tomatoes sounds like a good idea…once you start using freshly canned tomatoes to cook with, there is no going back. I don’t care what kind of store bought pomodoro you choose to purchase it just won’t measure up. By the end of last spring recipes were being carefully reviewed as to their ‘tomato worthiness’ and some just didn’t pass mustard, but we squeaked by and with proper rationing we almost made it. Enter - TOMATO-RAMA 2010! Two women, two days, 120lbs of tomatoes! Have we lost our *%!#*’! minds! Some, may say with conviction, Yes! But those who reap the culinary benefits seem to now cheer us on. And besides, by this point we have become a well oiled, tomato canning machine! Day one was devoted to marina sauce, a lovely mix of tomatoes, garlic, olive oil and herbs, cooked down to a thick rich sauce…
Marinara Sauce
Recipe for 1 quart jar

Ingredients

4 - LBS tomatoes, peeled, cored and cut into quarters
4 - Cloves garlic – peeled, then crushed, pressed, chopped or sliced
3 - TBS Olive Oil
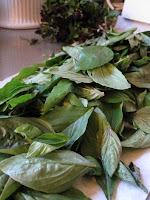
2 - 6” sprigs fresh Rosemary or handful of chopped Basil
1. Put lids in small pot to heat
2. Put jars in canning pot
3. Drop tomatoes into boiling water for 30 seconds, then into ice water
4. Peel and core tomatoes, cut into quarters
5. In a pot large enough to hold all the tomatoes, heat olive oil and sauté garlic until just beginning to turn golden brown
6. Add herbs of choice
7. Add tomatoes
8. Puree using hand blender (standing blender or potato masher will also work)
9. Cook down for 30 minutes
10. Remove glass jars from pot
11. Fill jars with hot tomato sauce, leaving ½” head space
12. Remove air bubbles
13. Wipe edge of can with clean damp towel
14. With tongs put 1 lid on jar and finger tighten ring on jar
15. Put jars into canning pot
16. When water is boiling again, process quart jars for 45 minutes (35 minutes for pint jars)
17. Remove from pot, cool

Day two (which actually occurred about a week later) was devoted to straight up canned tomatoes…the house smelled wonderful and the rewards…! All told we each have 15 quart jars of marinara sauce and 13 jars of tomatoes. Now that’s what I call a tomato larder and with any luck at all, should keep us…I’ll let you know next spring!

Monday, September 27, 2010

What I Did on My Summer Vacation...

There is just something wonderful about summer vacation…especially, I believe, the ones that are at the end of the summer. Maybe it’s a holdover from when we were kids, hanging out, goofing around, wearing your favorite casual clothes - usually sans shoes, doing pretty much what you want…and when it’s all over and we are all refreshed, it’s suddenly fall and a ‘new year’ is ready to start up again. Apparently Cesar was on a different school schedule when he decided that the new year should start in January, I believe most of us who spent at least the first 18 years of our lives in school feel like the new year starts in September…

For our summer vacations we once again traveled to the top of California and visited a cabin that sits right on the Smith River, just inland from Crescent City…it’s absolutely idyllic! The house is off the grid and is ‘powered’ by solar panels which somehow always seems to make me feel a little more connected to the earth, which is a good thing after a hectic year…it also eliminates TV, computers and other nonessentials and cell phones don’t get a signal. Your whole body just does a big exhale once you get settled in.
The weather was wonderful, warm in the day, cool - sweatshirt weather - at night. We had friends stay with us for the first few days and then my husband and I chilled by ourselves for the remainder of the week. We swam in the beautiful clear river, wetsuits preferable; we hiked on a historic mule trail that was built by Chinese workers to facilitate transport of gold from mines to San Francisco Bay during the gold rush; we read books and played cards; we stayed up late and slept in late; we
picked blackberries and canned blackberry jam; we even went down to the harbor in Crescent City and purchased fresh caught tuna from one of the commercial fishermen and brought it home to can for the upcoming year. All in all it was a pretty perfect vacation!
Now we are back at home and back at work. The days are getting shorter and fall is in the air. Feels like we are ready to start that new year!


Tuesday, September 21, 2010

So What About That Peach Canning Class?!

Okay, so it was several weeks ago that I let everyone know I was teaching a class about canning peaches…little slow on the uptake here, but I thought you all might like to hear how it went…’peachy’ - sorry that was too good to pass up! It was a lovely Saturday afternoon, not too hot, which is always a canning concern. I mean what’s up with most of the years canning taking place during the hottest months of the year. I think it’s
a test. If you can survive a 4 thousand degree kitchen, while racing around cramming bits of produce into small jars - you too can call yourself a canner…anyway, as is my usual M.O. I did my test canning at home so that I had the time schedule down pat as well as making sure the recipes I had dreamed up would be pleasing to the class. All went well on that front. This time I decided on plain canned peaches in light syrup. I figured that would give folks a good basis for other stone fruits, in case they had a nectarine tree or perhaps plums and the tree went berserk and all the fruit ripened at one, which has been my experience or they just wanted to enjoy some fruit sometime in the winter . We did a simple 6 part water to 1 part sugar syrup, filled the jars with peaches and syrup and processed them for 30 minutes. Pretty straight forward    everyone’s jar came out beautifully…
Next up was a peach chutney. I like to think that having one easy and one interesting item on the cooking agenda makes for a class that will hold everyone’s interest…or maybe I just subscribe to that ‘teaser’ mentality sort of like the big news shows…’peach chutney - details to follow’… the chutney is very tasty and works well with chicken or pork…it is also a nice add to soft cheeses like brie or chevre as an appetizer.
Peach Chutney
Ingredients

2 Qts. (aprox 15 med.) - Peaches, finely chopped

1 ½ Cups – Brown Sugar

½ Cup Golden Raisins

½ Cup Onion Chopped

1/8 Cup Mustard Seed

1 TBS. Ginger

1 Clove Garlic minced

1tsp. – Salt

8-10 Cardamom Seeds

2 ½ Cups – White Wine Vinegar

1. Cut a small ‘x’ on the bottom of each peach, drop peaches into boiling water for 1 minute, then into ice water

2. Peel, cut peaches in half and remove pit, finely chop pitted peaches

3. Put all ingredients in a large sauce pan.

4. Bring to a simmer

5. Simmer until thickened, aprox. 30 minutes – Stir frequently to prevent sticking

6. Put water in other two pots and bring to a boil while peaches are cooking

7. Put lids in small pot to heat

8. Put jars in canning pot

9. Remove glass jars from pot

10. Fill jars with hot chutney, leaving ¼” head space

11. Remove air bubbles

12. Wipe edge of can with clean damp towel

13. With tongs put 1 lid on jar and finger tighten ring on jar

14. Put jars into canning pot

15. When water is boiling again, process ½ pint jars for 10 minutes

16. Remove from pot, cool

We all managed to get our jars filled and processed and the class wrapped up in it’s allotted 2 hours. We had a great time and there are a few new canning converts in the central valley. Next class - apples…


Friday, August 20, 2010

Lovely French Cantaloupe...Oui!

D’Alger – French Cantaloupe, with highly perfumed, smooth and creamy flesh…now I ask you, how could one resist a French cantaloupe with a description like that! Well, I couldn’t and when I purchased my seeds this year that was one of my choices. I was a little worried, as I planted the seeds a bit late, that I would not have any success, but when the little green leaves started to appear I was hopeful. Then came a few pretty little yellow flowers, sort of miniature versions of squash blossoms, now I was excited. And then the bees got into the act…as the flowers multiplied, the vine was abuzz!
In fact I watched as several bees practically tipped over trying to stand on their heads in the little flowers. I actually had to stick my face into the vine to see what all the commotion was about…did the flowers smell? When my nose was right on top of the flower I could smell the sweetest fragrance almost like honeysuckle, no wonder the bees were excited! Pretty soon melons started to form – the bees had done their job…and the melons grew, and grew and grew…no more worries about no melons! But how to tell if the melons were ripe? These big black-green gourds were hard as a rock and since they looked nothing like anything I had seen before I had no reference point. Finally, after they had bathed in the sun several weeks I thought I should risk it and pick one…well, okay so big does not a ripe melon make! But it was close, the flesh was beginning to turn orange and there was a bit of cantaloupe flavor but we weren’t there yet. What to do with this big not quite ripe melon? I couldn’t quite bring myself to giving it up to the compost pile…it was so close! Then I remembered a recipe I had seen for pickled cantaloupe and it had suggested using slightly under ripe melon! Yippee! I dug out the recipe and although it called for 15 cups of cubed cantaloupe, I certainly wasn’t going to pick more under ripe fruit to make something that could potentially be something that no one would want to eat… but my melon produced 7 cups of fruit and half the recipe seemed like plenty.


SPICY MELON PICKLES
Adapted from Ball Blue Book
Guide to Preserving


1 ½ C Vinegar (I used white wine vinegar)

1C Water

1 Cinnamon stick

1tsp Whole cloves

½ tsp Whole allspice

1tsp Slivered, whole nutmeg

7C 1inch cubed cantaloupe

2 ¼ C Sugar

Combine vinegar and water in a large sauce pan. Tie spices in a spice bag (or make a little bag using cheesecloth and kitchen twine)and add to vinegar mixture. Bring to a boil. Reduce heat and simmer 5 minutes. Remove from heat. Add melon; let stand 1 ½ - 2 hours. Add sugar. Bring to a boil, stirring until sugar dissolves. Reduce heat; simmer until cantaloupe becomes slightly transparent (I found that took about 20 minutes). Pack hot melon into hot jars, leaving ¼ inch headspace. Ladle hot pickling liquid over melon, leaving ¼ inch headspace. Remove air bubbles. Clean rims of jars. Put two piece lids in place. Process 10 minutes in a boiling water bath.

The half recipe produced 2 pint jars, which I figured would be plenty…until I tasted one little piece of cantaloupe I saved out of the jars…now I realize these will be better after they have a chance to sit, like all homemade pickles do, but I am here to tell you these things are great! The sweetness of the spices, fruit and sugar with the tang of the vinegar are super yummy. So my experiment in thriftiness paid off…who would-da thunk…

Wednesday, August 11, 2010

Can you believe it's time for Cranberry Beans!?


Oh my gosh! I am so behind! I haven’t posted to the blog in weeks! Not a good thing, but now I am back and ready to roll…


So on that note…You know how when you need a new coat, and you know you need to go to try on that WOOL coat in AUGUST, because you know that’s the best time to look, because that’s when the new styles are in the stores, but you are having trouble getting your head around winter clothes in the summer…okay, so when the cranberry beans showed up in the farmer’s market this week I had a bit of that feeling come over me. For those unfamiliar with these beans, they are wonderful in hearty stews, soups and all foods winter. Cranberry beans have a slightly nutty flavor, are rich and creamy and don’t get mushy when cooked in a stew or soup. A real winter food and about the last thing I am thinking about when there are loads of summer fruits and vegetables to be had! I was introduced to these beans a few years ago by a man at the farmers market…he was purchasing as many as he could get in his basket!
When I asked him what was the big deal he went on and on about the virtues of these beans, to the point that I thought I needed to give them a whirl. I’ve never looked back. They are my ‘go to bean’…the problem is that they are an heirloom and are not a bean that shows up in every store as a dried bean.
Soooo, when they appear at the farmers market, I jump on them – I’ve become that guy, buying up all the beans in town. Actually I purchase them during a few trips to the market since they need to be shelled and that can get a little tedious in huge doses. These beans freeze well, so getting them fresh, shelling them and putting them into packages, say 2 cups per bag and then putting them in the freezer is pretty perfect. Fresh beans don’t need any soaking to get them ready for cooking and they cook more quickly, so when you decide at say 5:30 on Saturday that you want a hearty soup for dinner, it’s no big deal! I have used them for everything from minestrone soup, to chili and lots of other concoctions I have dreamed up out of all the tidbits in the refrigerator. There is a wonderful recipe for minestrone soup in
Alice Waters’ book The Art of Simple Food. She has four variations, one for each season and the one for fall is my personal favorite and one of my favorite places for Cranberry Beans.


Fall Minestrone
Adapted from Alice Waters – The Art of Simple Food


2 cup of fresh Cranberry Beans
1/4 cup olive oil plus more for garnish
1 large onion, finely chopped
2 carrots, peeled and finely chopped
4 garlic cloves, peeled and coarsely chopped
1/2 teaspoon chopped rosemary
2 ribs celery, finely chopped
1 teaspoon chopped sage
1 bay leaf
2 teaspoons salt
3 cups water
1 leek, diced
1 Qt. jar of tomatoes – I use a Qt. jar of the tomatoes I can in the summer which is really
Yummy!
1 bunch of kale, washed, stemmed, and chopped
1/2 butternut squash, peeled and cubed
grated parmesan cheese for garnish

Heat in a heavy bottomed pan over low heat:
olive oil, carrots, onion
Cook for 15 minutes or until tender

Add:
garlic, rosemary, sage, salt, bay leaf, tomatoes, kale
Cook for 5 minutes

Add beans and 3 cups of water, and bring to a boil
When boiling, add the leeks and squash
Cook for 15 minutes, or until the squash and beans are tender

Season with salt and pepper. Garnish with olive oil and Parmesan.

So when the weather gets cool enough to even think about this recipe, I encourage you to try it!

Thursday, July 22, 2010

There's Honey in These Here Hives!


We have honey! We did a check of the hive the other day and I am here to tell you, those little gals have been crankin’ and the hive is crazy with honey! We have learned that from about now until the end of September or October there is a huge amount of nectar collection and hives will produce a great deal of honey, which is what prompted us to check the hive to begin with. It is truly amazing what has occurred. If you will recall, the last time we checked the hive, back at the end of June, there was honey, but we felt we needed to give them a bit more time to really start filling things up. Well, in under a month they have filled up every square inch! So much so that we have added yet another box – don’t want to inhibit honey production, heaven knows! We figured if we took a bit of honey now and then left them be until the end of September we could do one really big harvest before we got them ready for the winter
So the harvesting began…we removed three small frames which are actually quite heavy, proportionately, when filled with comb and honey on both sides…they say that the small frames weigh about three lbs. each when full! Getting the bees off the comb was quite a task, they are rather attached to their product it seems! Once we managed that, we replaced the frames with new ones so that they could start the process all over again. Then we took the frames into the house, there came a bit of ‘okay, now what do we do’! The honey is ‘capped’ meaning it’s all sealed up. When the bees first put the honey in the comb it has a high percentage of water in it, so the bees just let it sit until the water evaporates, at that point the honey is considered ‘ripe’ and the bees cap it with wax. So, to get to the honey you need to ‘uncap’ it…then the honey can drain from the comb.
The object is to leave as much of the comb intact so that when you return the frame to the hive, the bees don’t have to build the comb from scratch, it’s more of a clean and repair type project. Well as newbies at this we pretty well destroyed the comb, so then we needed to strain the wax out of the honey – very sticky…but the good news is then we had nice beeswax for a candle! Our little harvest produced three quart jars of beautiful golden honey! And, oh my gosh is it yummy! At this rate we will be able to share with friends and family after the fall harvest or as one friend suggested…we can make mead…hmmmm!

Friday, July 9, 2010

Teaching a Tomato Canning Class...


Big excitement! I have been asked to substitute teach a tomato canning class at our local food coop’s learning center! After the initial panic – how would I put together a lesson plan? what recipes would I use? what sort of equipment do they have in their kitchen? – I settled into the business of actually putting it together. First, what recipes…well obviously plain, canned tomatoes, then perhaps a nice marinara sauce and last…hmmm…I know tomato jam!

Just to be on top of things, I brewed up a batch of canned tomatoes so that I could time myself and to streamline my operation…it’s one thing to be a bit frenetic in your own kitchen while cooking – digging for the ladle, say, at the moment you need it rather than having all your tools laying out, organized and ready…30 minutes, okay I could move a novice group through that in an hour…next the marinara sauce. A girlfriend shared her wonderful family recipe for what I think is over the top sauce and although I want to show this to the class I decided that due to the fact it needs to cook down for quite a while, and the class is, after all only 3 hours, I would need to simply demonstrate this recipe rather than have the whole class participate. Then the jam…I have tasted some really out of this world tomato jam, but I don’t have a recipe of my own that I
could just go to.
Thus started the tomato jam experiment! Nothing like reinventing the wheel…under pressure…I looked up about a billion recipes and I’ve got to say some were pretty odd. When you think tomato jam do you think vanilla for example? Or some just had too many spices that didn’t seem to fit. I wanted a ‘better than catsup’ sort of jam. Sweet, but not too; vinegar tangy, but not pucker-y; a bit complex, but not complicated. I put some ideas together and brewed up a batch…nope, too much like chutney and too dry. Back to the drawing board. Based on my first experiment, I made adjustments and tried it again…now we’re talkin’…below is the recipe I came up with for tomato jam…I will say that the next time I make this recipe it think I will increase the vinegar by about ¼ cup to give it just a little more zip, but give this one a try, it has nice balance with just a light tang of vinegar…

Tomato Jam

Recipe for 4 – ½ pintjars

Ingredients

4 lbs - Tomatoes, coarsely chopped

2 Cups - Granulated Sugar

¾ Cup – Brown Sugar

¾ Cup – Cider Vinegar

1 Whole Medium Onion, chopped medium/fine

1 ½ tsp. – Salt

½ tsp – Ground Allspice

1. Prepare jars & lids

2. Drop tomatoes into boiling water for 30 seconds, then into ice water

3. Peel and core tomatoes, cut as noted above

4. Put all ingredients in a 3 quart sauce pan.

5. Bring to a gentle boil

6. Cook at gentle boil until thickened, aprox. 40 minutes

7. Fill jars with hot jam, leaving ½” head space

8. Remove air bubbles

9. Wipe edge of can with clean damp towel

10. Put lid on jar and finger tighten ring on jar

11. Process ½ pint jars for 15 minutes

Let me say you may need to crack open a jar and have some on a nice piece of crusty toast with a glass of wine as soon as things are cool…a reward for a job well done!

A Little Technological Update...


Phew! I don’t know about you but sometimes technology can just wear a body out! You can head down a path, get everything setup and organized, then oops! you realize, ‘that’s not the way I really wanted to do that’ so then you have to UN-do all the stuff you set up (hopefully remembering all the passwords and log-in names you used back when you set stuff up) and then Re-set up all your stuff in a new way…


Well, that wordy, and slightly exhausted, whine-out was to happily announce… Da Ta Da Da! Kitchenkapades now has it’s own website! www.kitchenkapades.com My thinking was that perhaps a website would be easier for folks to find. Also Kitchenkapades now has it’s own Facebook page! It is called Kitchenkapades Kitchen. I will be posting notices of new blog posts there, so you can keep up to date if you wish…if you are currently a member of the group Kitchenkapades you will need to become a friend of Kitchenkapades Kitchen (seems in the world of Facebook you need two names). I will continue to post notices of new Kitchenkapades posts to both locations for a while, but eventually I will let the group go. I hope you will all come over to Kitchenkapades Kitchen! Lastly, if you would like to communicate with me directly you can email me at janet@kitchenkapades.com I really have fun with this blog and appreciate your continued support!

Tuesday, July 6, 2010

Picante Jarabe de Mora...what's not to love!

It all started with the wonderful sort of news letter I receive from 101Cookbooks.com…the author does absolutely mouth watering food photos and her recipes and information are totally inspiring. Well, last week she wrote about a recipe for Chile Blackberry Syrup. Boy was I all over that one! Blackberries with spice?! My taste buds did a little happy dance just thinking about it. I not so patiently waited until our Sunday farmer’s market and went on the hunt for the biggest sweetest berries…apparently my ‘ask and ye shall receive’ juju was on overdrive because I found some of the biggest, juiciest blackberries I have seen in a long time and at $3 for two generously filled pint baskets I was a happy camper! I then went to our food coop to purchase the dried chilies. Unfortunately they did not have either pasilla or the guajillo chilies but I learned that the New Mexico Red Chile is a third alternative, and those were available. Home I went ready to make syrup…
CHILE BLACKBERRY SYRUP – copied from 101cookbooks.com, with minor alterations…

4 dried guajillo peppers ( I substituted 4 dried New Mexico Red Chiles)

1 cup/6 oz/170g dark Muscovado sugar or dark brown sugar (I used the dark brown

sugar and it created a lovely flavor)

1 cup / 7 oz / 200 g organic sugar

1 1/2 cups / 355 ml water

1/4 cups fresh lemon juice

3/4 cups / 3.5 oz blackberries

Trim the stems from the dried chiles. Tear chiles into pieces and drop (along with seeds) into a medium saucepan. Stir in the sugars, water, and lemon juice, and bring the mixture to a boil over medium heat. Boil, stirring regularly, until the mixture has reduced to 2 cups / 475 ml, roughly 20 - 30 minutes. – it took me just 20 minutes to get a lovely syrup consistency…

In the meantime, puree the blackberries. I used a hand blender in a small bowl, but a standard blender is also an option. Force the berries through a fine-mesh strainer, and discard any seeds. Set the berry puree aside.

Once the chile mixture has reduced, remove from heat, and (carefully) puree it with a hand blender until smooth. (I found that the hand blender caused a lot of very hot splattering, as well as some trouble pureeing the chile pieces – maybe I didn’t tear them up enough, so I dumped the whole thing into my standing blender and had good success) Strain through a sieve into a heat-proof bowl. Press on the remaining solids in the strainer to squeeze out the remaining syrup, and discard the remaining solids. (but before you do be sure to taste ‘the solids’ – I actually put some on tortilla chips – the texture wasn’t perfect but it was really yummy…)

Whisk the berries into the chile syrup and set aside to cool. Place in a jar, or smaller jars, and refrigerate.

Makes about 2 ½ cups.

We drizzled it over a little goat cheese and served it with some very ‘seedy’ crackers and it was delish! 101 cookbooks suggested running a thin vein of the syrup through a cheese cake…and you know how I am about cheese cake…I think we’re going to have to give that a try!

Monday, June 28, 2010


Well, it’s time for a bee update…several folks have asked how the bees were doing and my response is generally, ‘busy’…now as you may remember, it was back in mid April, when we received our package of bees and set about being beekeepers…and I must say all has been going very well. We took a beekeeping class at the end of April and learned some of the finer points of keeping these little guys happy and healthy. The next job was to check the hive about every 2-3 weeks to make sure everything was going along nicely. We had heard horror stories from other beekeepers about not checking the hives often enough and having them over run with these disgusting moths that can attack a hive, or having the queen get sick and the hive just sort of withering up. So a couple weeks into May we gave our crew a check…lots more bees – yippee!
We determined it was time to add a second box on top of the first to let them expand further.
Now when the Sacramento summer goes full tilt there is lots of stuff growing and blooming and a lot for a little bee to do… producing more bees being high on the list. Well I started noticing that there seemed to be a lot of bees hanging out outside the hive and proceeded to freak out that they were getting too crowed and would swarm and hence leave us for more palatial digs…so long about the first of June we decided to do a very thorough check of the hive and sure enough they had all but filled up the second box! Now I’ve gotta say, calling someone busy as a bee is bordering on wacky, nobody can work that hard! Anyway we added another half size box and figured we were well on our way to being able to harvest honey…
Three weeks have passed since then and yesterday, one of our first truly hot summer days,
we donned our bee garb, hat with screen, long sleeved shirt, long gloves, jeans with legs tucked into socks…uber hot – even I, a non-sweaty sort of gal was literally dripping – I just kept thinking ‘ this is probably really good for my skin…’ We then fired up our smoker, the smoke seems to calm the bees and they become a lot less active, which
at this point is really important since there are so many and they get really cranky when you start messing with their stuff.
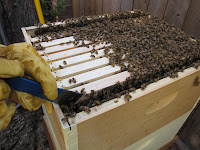
We then started our inspection. Now there are LOTS of bees! It is actually more difficult to do our work because they are everywhere! They are beginning to fill the third box with comb and there are frames in the second box filled with honey! There were also all sorts of bee larva, another good sign. The full boxes actually weigh in at about 40 lbs! We thought about taking some of the honey but thought we would let them fill up the third box a little more before we started harvesting. I am so curious about what our honey will taste like!
When you think of all the various flavors, Orange Blossom, Lavender, Wild Flower, I can hardly wait to taste Urban Sacramento! We managed to get everything put back together, very happy to get out of our now wet, bee garb, let the bees calm down and congratulate ourselves at our ever improving skillfulness at checking the hive. I’m pretty sure next time we will be tasting honey…I will be sure to give you a review!

Friday, June 18, 2010

It’s the age old question, bananas are black and mooshie, yikes what to do with them?! My husband eats a banana every day with little exception, so we always have them on hand. Well this week he was out of town for three days and simultaneously we have been launched into true Sacramento summer (‘bout time actually)with temps in the nineties, and since we do not have air-conditioning, relying on windows opened at night and good insulation to cool things down, the fruit in the bowl on the counter ripens up a lot faster. Before I knew it there they were, big, black, bananas…Now personally I only know of three things to do with bananas in this condition, and one of them is throwing them out. Wanting to go for something a little less wasteful, I was left with the other two options, a banana milkshake or banana nut bread. Banana milkshakes were my mom’s solution to overly ripe bananas. She would put a banana, a couple scoops of vanilla ice cream and milk into the blender and there it would be, a nice Saturday lunch for my sister and me. She figured it was pretty healthy – fruit and protein – as well as a nice treat and since we weren’t big eaters one shake took care of the two of us…


Well, today I didn’t have any vanilla ice cream in the house, but I did have all the ingredients for banana nut bread with the exception of walnuts, so imagining what bananas would taste like with pecans, which I did have, I went for it!

I used the recipe from ‘The Best Recipe’ by the editors of Cooks Illustrated – a great cookbook by the way if you are in the market for a good basic cookbook with good no fail recipes. It’s just a basic banana nut bread…

2C all purpose flour

¾ C sugar

¾ tsp baking soda

½ tsp salt
                                      
1 ¼ C toasted pecans, chopped course

3 very ripe bananas, mashed well

¼ C plain yogurt

2 lg eggs, beaten lightly

6 TBS butter, melted and cooled

1 tsp vanilla extract

Adjust oven rack to lower-middle position and heat oven to 350 D. Grease and flour bottom only of regular 9” x 5” x 3” loaf pan – now I have to interject here, how is it that someone who owns no less than six different loaf pans, never has one the size that the recipe calls for – am I the only one who has this problem? Just a question…

Whisk flour, sugar, baking soda, salt and pecans together in large bowl; set aside

Mix mashed bananas, yogurt, eggs, butter and vanilla with wooden spoon in medium bowl. Lightly fold banana mixture into dry ingredients with rubber spatula until just combined and batter looks thick and chunky. Scrape batter into prepared loaf pan, bake until loaf is golden brown and toothpick inserted in center comes out clean, about 55 minutes. Cool in pan for 5 minutes, then transfer to wire rack.

Well, soon the kitchen smelled heavenly and out of the oven came a beautiful loaf of bread…we let it cool just enough and then treated ourselves to a slice with a little butter…yum-er-iffic! Nothing like good old banana nut bread!